Garage Door Panel Removal: Tools, Tips & Expert Instructions
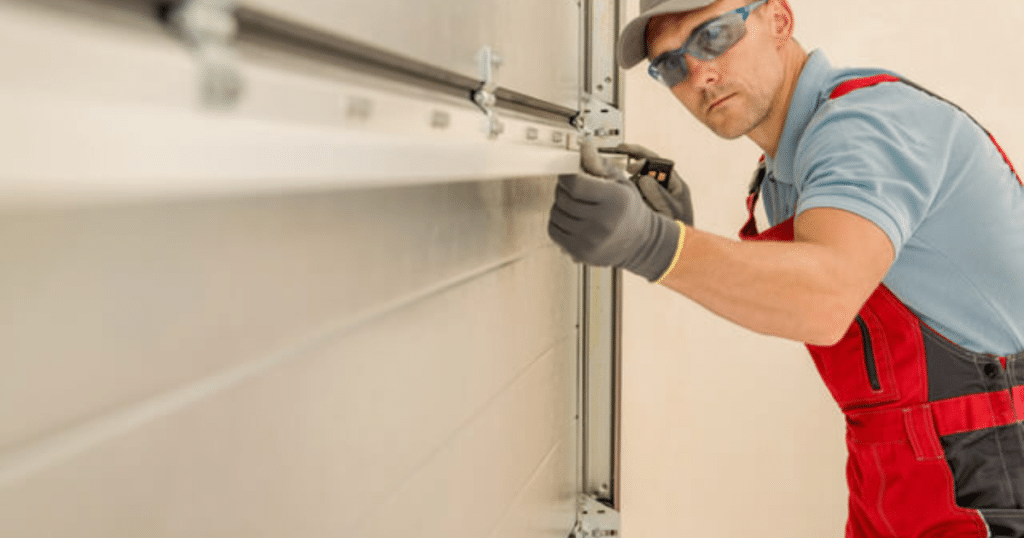
Your garage door adds safety, style, and everyday convenience to your home. However, over time, dents, rust, or other damage can affect its appearance and performance, causing it to open or close unevenly or make unusual noises. To remove a garage door panel, unplug the opener, release spring pressure, and unbolt the damaged section. Carefully lift it out while keeping nearby panels steady to avoid shifting, cracking, or affecting the overall balance of the door. Knowing how to remove garage door panels properly helps protect your door from additional damage. It also makes repairs easier and saves time by guiding you through each step with clear and simple instructions. Continue reading for tips, safety steps, and clear instructions to remove panels correctly. Fix your garage door and keep it working smoothly without replacing the entire system. When Should You Remove a Garage Door Panel? Before diving into tools and techniques, let’s first understand when it’s necessary to remove a panel. You might consider it if: The panel is bent, cracked, or dented beyond repair. Rust or rot has spread in steel or wooden doors. There’s a visible separation or warping affecting alignment. A vehicle bumped into the door, causing damage to only one or two sections of the door. You want to repaint or restore just one area of the door. Replacing one panel is often more affordable than a complete door replacement, but this depends on the extent of the damage and whether your garage door model is still available. Safety Tips Before Removing Garage Door Panels Removing a garage door panel isn’t like fixing something small. These doors are heavy and use strong springs. One mistake can be risky, so it’s essential to stay cautious, be prepared, and follow safety steps. If your garage door has a motor, unplug it first. This prevents the door from moving while you work. It’s a small step, but it helps keep you safe and makes the job easier. To remove a garage door panel, start with the one that is broken. If it’s low or in the middle, try it yourself. If it’s higher or other parts appear damaged, call a garage door repair expert. Tools You’ll Need to Remove a Garage Door Panel The process requires a few standard tools that most DIYers already have at home. These include: Adjustable wrench or socket set Cordless drill or screwdriver Locking pliers or C-clamps A ladder Work gloves and safety glasses A friend or helper (recommended) It’s always easier and safer to work on large panels with someone assisting you. Most garage door panels are bulky and can shift unexpectedly when unbolted. How to Remove Garage Door Panels Now, let’s get into the actual process. This detailed walkthrough explains how to remove garage door panels carefully and efficiently. 1. Disconnect the Garage Door Opener Pull the red release cord on your automatic garage door to stop the opener. This allows you to lift and lower the door by hand until the damaged panel is easily accessible. Unplug the opener from the wall to turn off the power. This prevents the garage door from opening accidentally and keeps you safe while working on repairs or maintenance. 2. Secure the Garage Door Clamp the garage door track below the panel using C-clamps or locking pliers. This keeps the door steady and stops it from moving while you work on replacing the damaged garage door panel. Always support the door before removing a panel, especially if it’s in the middle. A loose door can shift or fall, making garage door repair unsafe and more difficult to complete. 3. Remove the Hinge Bolts Garage door panels are connected with hinges and bolts. Use a screwdriver or socket wrench to slowly remove the bolts holding the damaged panel to the one above it. Some hinges may hold rollers, so be careful when removing them. Go slowly and keep all parts in a safe place so you can reuse them later. If the panel has support bars or struts, remove those as well. This helps loosen the panel fully, making the repair easier and safer. 4. Detach the Panel from the Track (If Necessary) If the broken panel is at the bottom, you should lift the rollers out of the side track. Open the door a little or tilt the panel gently. Be careful because the rollers sit in metal tracks under pressure. Ask your helper to hold the door steady while you carefully slide the panel out. If it feels stuck, check for any bolts or screws you missed. Don’t force it—pulling too hard can bend the track or make the door uneven. 5. Remove the Damaged Panel After removing the hinges and rollers, the panel should come loose. Lift it out slowly. If it’s large or heavy, have someone help you carry it safely. Place the panel in a safe spot. Be careful of sharp edges or splinters, especially if the door is old or made of wood. Now that the panel is out, you’re halfway done with the repair. Before installing the new panel, take a moment to review a few tips that can make the next steps easier. Expert Tips for Removing Garage Door Panels Removing garage door panels requires some care, the right tools, and a bit of skill. Follow these simple tips to do it safely and efficiently. Document Before You Dismantle Before you start removing any parts from your garage door, take clear photos of how the hinges, bolts, and brackets are set up. These pictures will help guide you when putting the new panel in place. A quick snapshot now can save a lot of trouble later. Use the Right Replacement Panel Make sure the replacement panel matches your garage door’s brand, model, and size exactly. Using the wrong panel can lead to gaps, uneven movement, or jamming. If your door is older or no longer manufactured, it might be better to replace multiple panels or even the entire
